💡 Introduction: What is XAMPP?
If you are a web developer or student learning PHP, MySQL, or WordPress, you’ve probably heard about XAMPP.
XAMPP is a free and open-source cross-platform web server package developed by Apache Friends. It helps you create a local server environment on your computer for developing and testing websites before uploading them to a live web server.
⚙️ What Does XAMPP Stand For?
XAMPP is an acronym:
- X = Cross-platform (Windows, Linux, macOS)
- A = Apache (Web Server)
- M = MySQL (Database)
- P = PHP (Server-side scripting language)
- P = Perl (Programming language)
Together, these components make XAMPP a powerful and easy-to-use tool for local web development.
🧩 Why Use XAMPP?
Here are some key reasons why developers prefer XAMPP:
- ✅ Easy Installation – One-click setup for Apache, PHP, and MySQL
- ✅ Cross-Platform Support – Works on Windows, macOS, and Linux
- ✅ Free & Open Source – No license required
- ✅ Local Server Testing – Safely test your code before going live
- ✅ Built-in Tools – phpMyAdmin, FileZilla FTP server, Mercury Mail, and more
🪄 How to Install XAMPP (Step-by-Step Guide)
Let’s go through the installation process of XAMPP on your system.
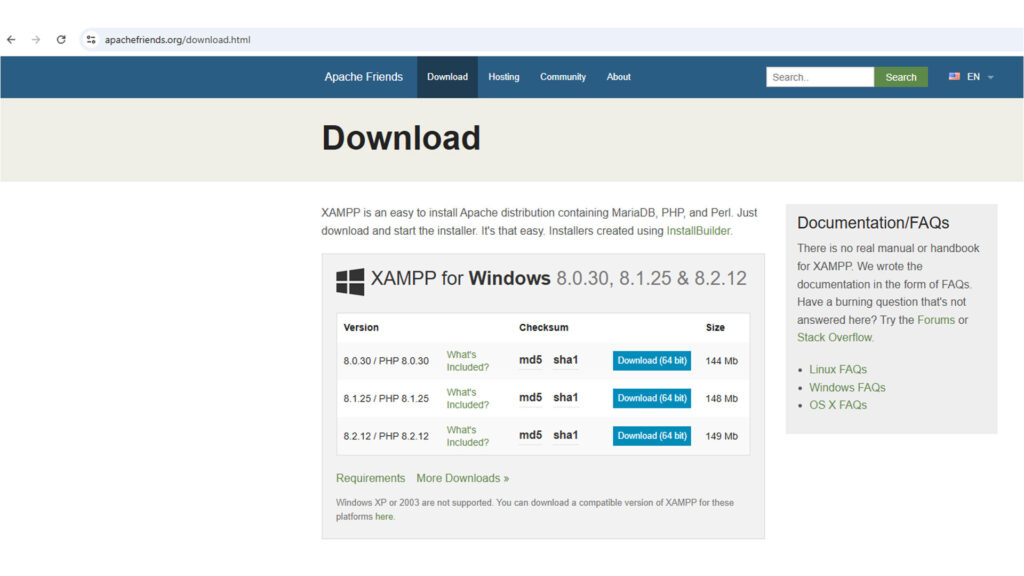
🪟 Step 1: Download XAMPP
- Go to the official website: https://www.apachefriends.org
- Choose your operating system — Windows, Linux, or macOS.
- Click the Download button to get the latest version of XAMPP.
⚡ Step 2: Run the Installer
- After downloading, locate the XAMPP installer file (for example,
xampp-windows-x64-installer.exe) in your Downloads folder. - Right-click and choose Run as Administrator.
- If a warning appears, click Yes to continue.
⚙️ Step 3: Choose Components
You’ll see a list of components such as:
- Apache
- MySQL
- PHP
- phpMyAdmin
- FileZilla FTP Server
👉 Keep the default selection (Apache, MySQL, PHP, phpMyAdmin) and click Next.
📂 Step 4: Select Installation Folder
Choose the location where you want to install XAMPP.
By default, it installs in:C:\xampp
Click Next to proceed.
🔄 Step 5: Complete the Installation
- Once the setup is complete, click Finish.
- The XAMPP Control Panel will open automatically.
🧠 Step 6: Start Apache and MySQL
In the XAMPP Control Panel:
- Click Start next to Apache and MySQL.
- If both modules turn green, your local server is running successfully.
- Open your browser and type http://localhost/ — you should see the XAMPP dashboard!
🎉 Congratulations! You have successfully installed XAMPP on your computer.
🛠️ How to Test PHP on XAMPP
To test if PHP is working:
- Open the folder:
C:\xampp\htdocs - Create a new file named
test.php - Add the following code:
<?php
echo "Hello, XAMPP is working!";
?>- Save the file.
- Open your browser and type http://localhost/test.php
If you see “Hello, XAMPP is working!”, your setup is perfect.
🧱 How to Uninstall XAMPP (If Needed)
If you ever want to remove XAMPP:
- Open Control Panel → Uninstall a Program.
- Select XAMPP and click Uninstall.
- Delete the leftover
C:\xamppfolder if needed.
🏁 Final Thoughts
Installing XAMPP is one of the first steps in learning web development. It allows you to test PHP, MySQL, and even WordPress locally without needing a live hosting plan.
If you’re a beginner, XAMPP gives you a safe, offline environment to experiment and learn before publishing your website online.